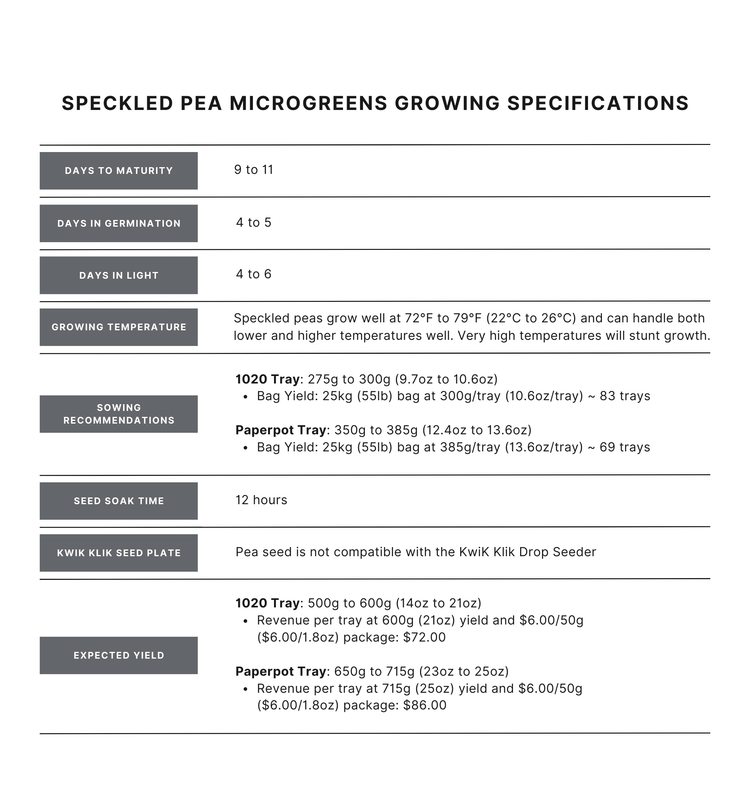


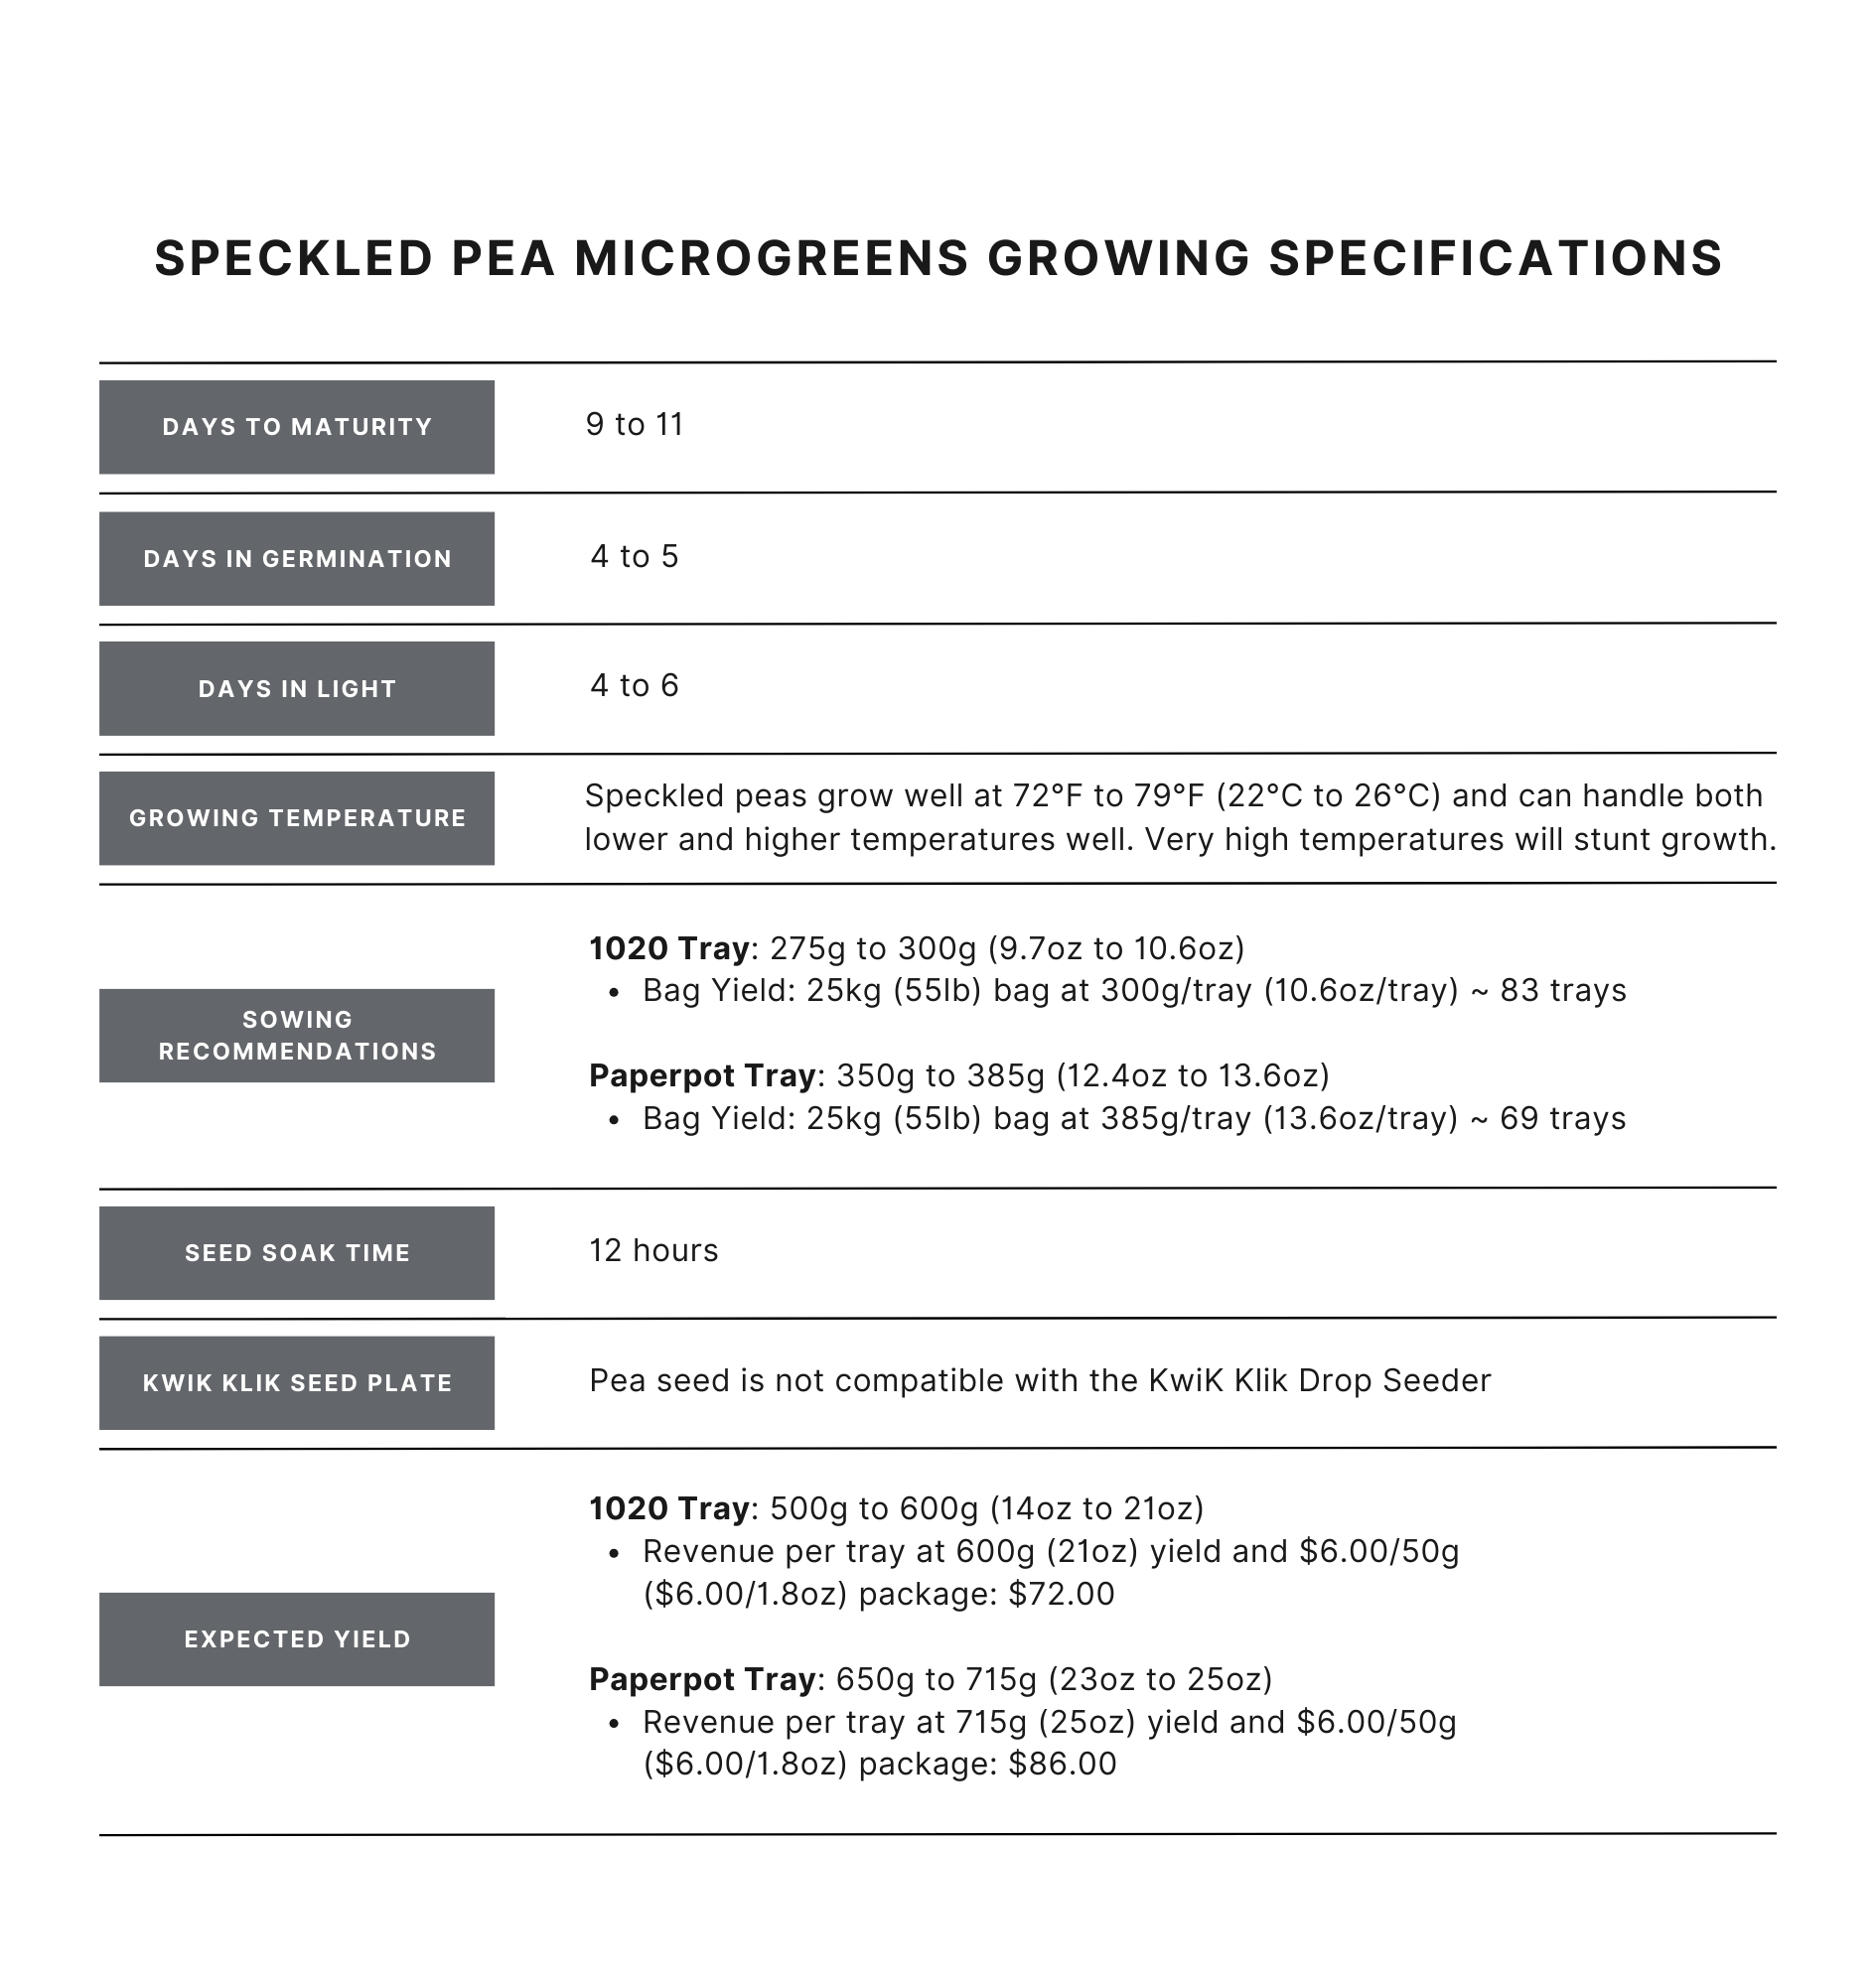
- Days to Maturity: 9 to 11
- Days in Germination: 4 to 5
- Days in Light: 4 to 6
- Pea grows well at 72°F to 79°F (22°C to 26°C) and can handle both lower and higher temperatures well. Very high temperatures will stunt growth.
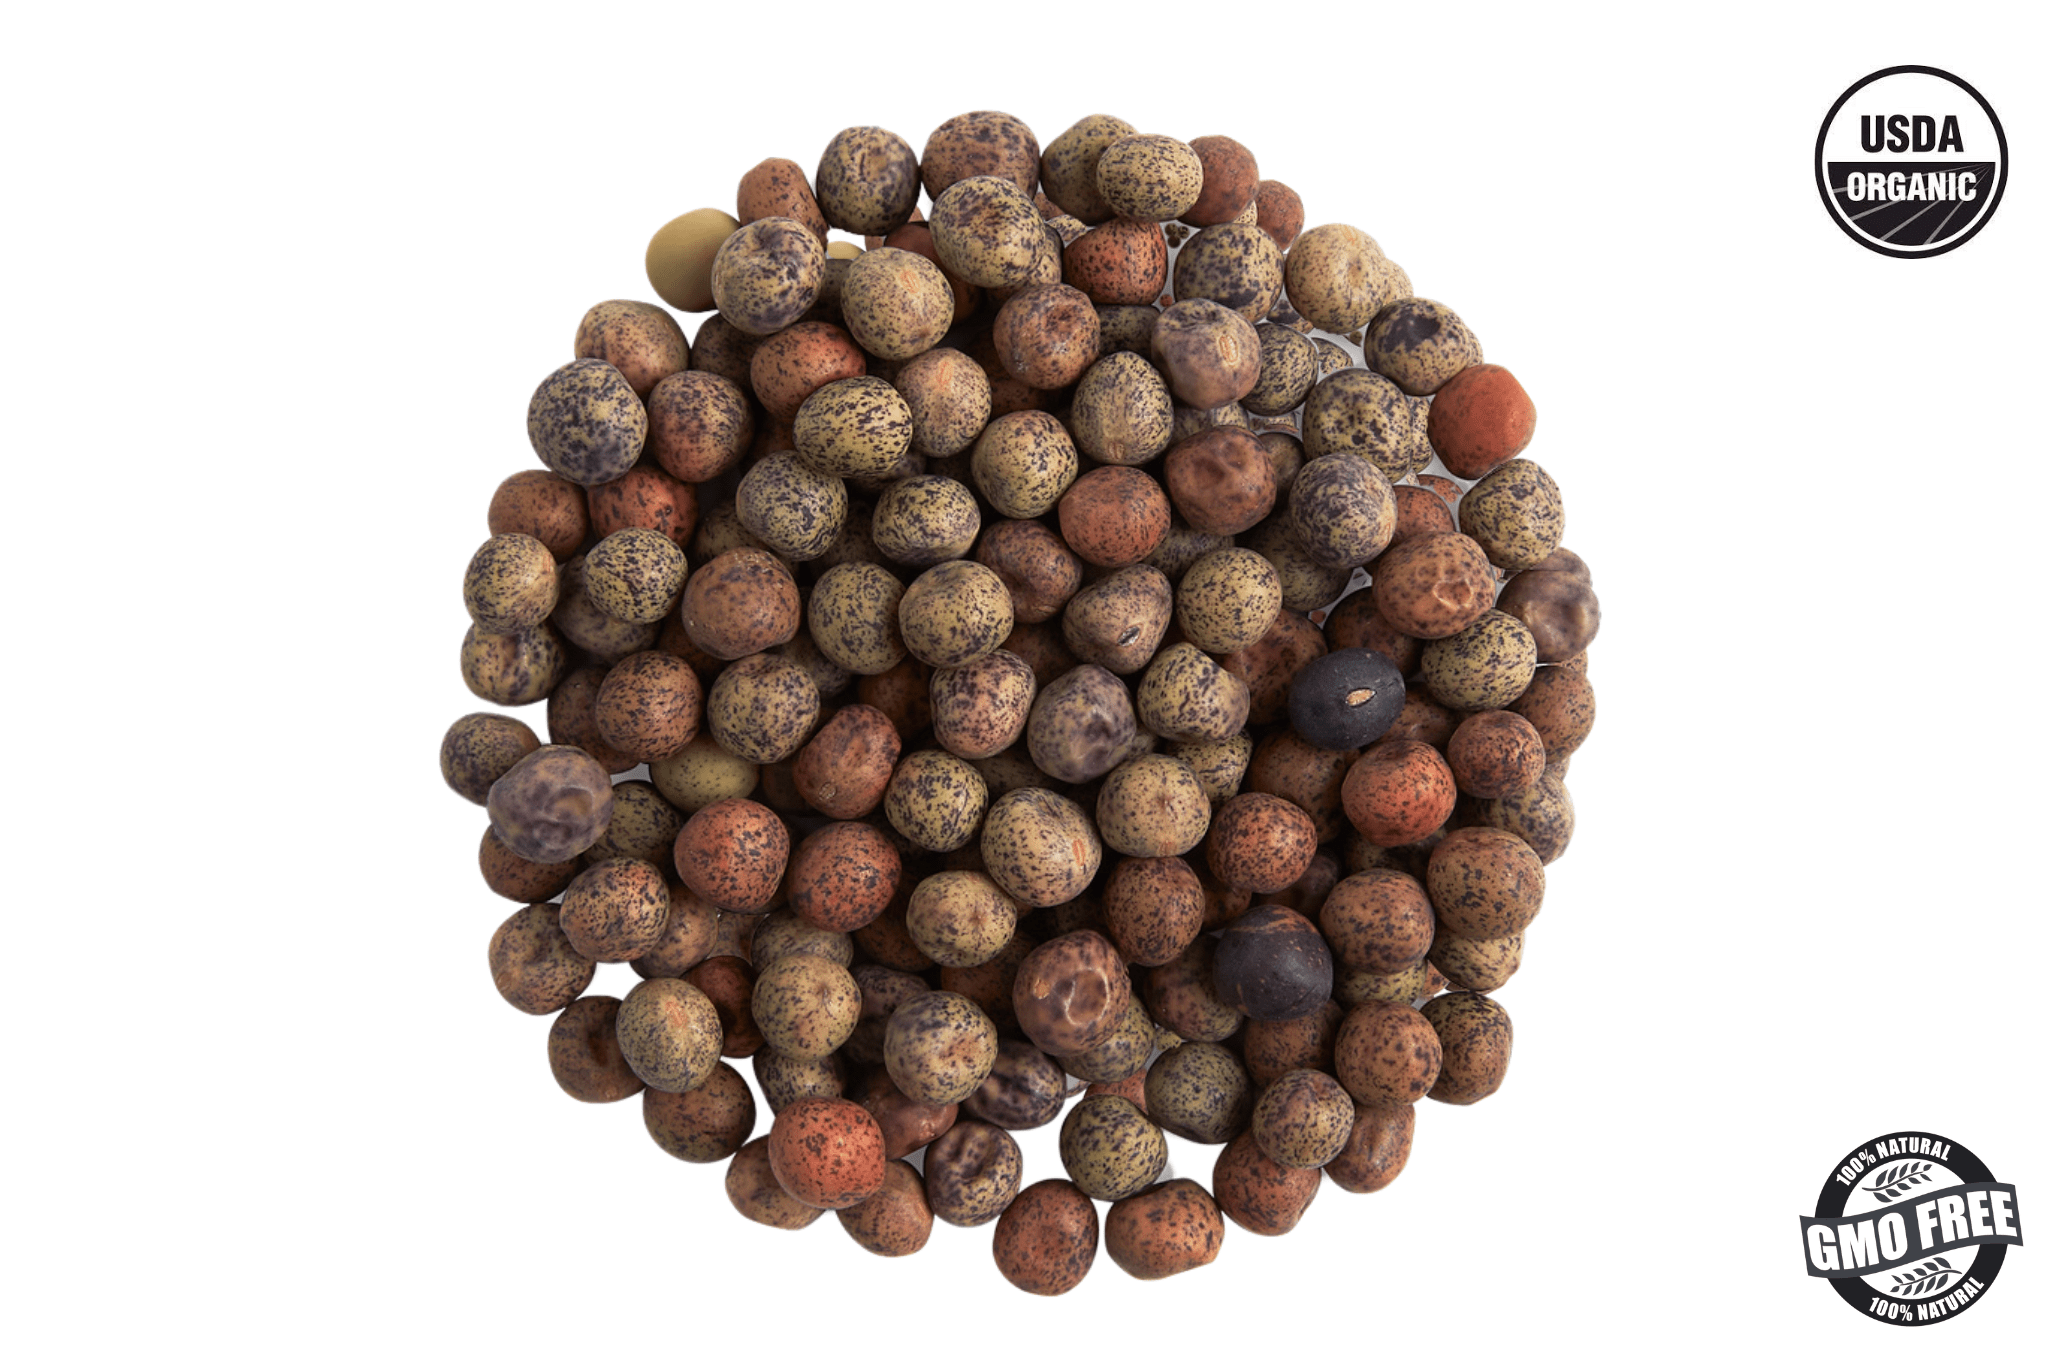
- 1020 tray: 275 to 300g per tray.
- Paperpot tray: 350 to 385g per tray.
- 12 hours
Crop Cycle:
Crop Temperature:
Sowing Recommendations:
Seed Soak Time: